Help & Advice
Why Your Soil & Sand Stabilizer Fails – Tips for Firm Binding
Introduction:
Soil & sand stabilizer is becoming prevalent in outdoor landscape designs. It preserves a natural soil texture that blends seamlessly into the environment, eliminating the visual discomfort of artificial materials while reinforcing the surface and suppressing dust and dirt. Environmentally friendly water-based acrylic formulas like our TerraTight™ Stabilizer https://syn-pros.com/product/terratight-ease-heavy-duty-water-based-uv-resistant-resin-for-soil-stabilizing-aggregate-binding/ keep landscapes odorless, nontoxic, and safe for people, plants, and pets.
Many contractors have enthusiastically embraced the product but have faced issues during construction. Even when they follow the construction steps and recommended usage, they sometimes fail to bind the particles and form the intended surface. In such cases, they naturally suspect that the chemical is defective. As both the developer and manufacturer of soil and sand stabilizers and an experienced contractor, we have helped numerous clients resolve these issues. In most cases, our analysis shows that the chemical is not at fault; the real cause lies in overlooked procedural details. Below are several key tips to improve your soil and sand stabilizer construction.
1. Watch Out for Pot Life
- Problem:
Inexperienced workers often extend the application process beyond the pot life of the chemical. After the adhesive has passed its peak bonding time, they continue compacting or leveling, which breaks the bond and wastes the chemical.
- Explanation:
Unlike polyurethane, acrylic does not dramatically solidify when it reaches the end of its pot life, so people tend to forget that, like all adhesives, it loses bonding ability over time. Take our TerraTight™ Stabilizer https://syn-pros.com/product/terratight-ease-heavy-duty-water-based-uv-resistant-resin-for-soil-stabilizing-aggregate-binding/ as an example: its bonding strength typically peaks within 30–40 minutes after use. Any agitation in the form of pouring, stirring, or spraying accelerates the chemical reaction.
- Solution:
Always pay close attention to the pot life indicated on the container and strictly time your operations. We recommend planning construction in zones (for example, 20 m² for each half-hour session). Print out simple handwritten charts like the one below and ask workers to fill them in:
| Zone No. | |
| Start Time | |
| First Spray | |
| Compaction | |
| … | |
| End Time |
- Extra Tips:
Aim to complete all pressure-applying activities (compacting, leveling, sanding, etc.) within the pot life. Topcoat spraying or decorative work can be done later, once the previous layer has fully cured.
Immediately after opening the lid, it is normal for the tack to feel relatively low because the reaction is only just starting. Do not wait for the fluid to become sticky before beginning construction.
2. Scratch And Shuffle to Avoid Surface-Only Binding
- Problem:
Some contractors only spray the chemical heavily onto the surface, creating a thin bonded shell that easily cracks under pressure. To increase strength, they apply multiple coats, but the chemical still does not penetrate deeply enough to form a thick, durable structure.
- Explanation:
Many online videos show acrylic stabilizers as a simple spray-and-go solution. For small-scale, non-load-bearing applications (for example, binding a few loose rocks for decoration), simple spraying is often sufficient. Load-bearing surfaces, however, require more sophisticated construction. This is why we always distinguish between “soil and sand stabilizer” and general “rock and mulch adhesive”.
- Solution:
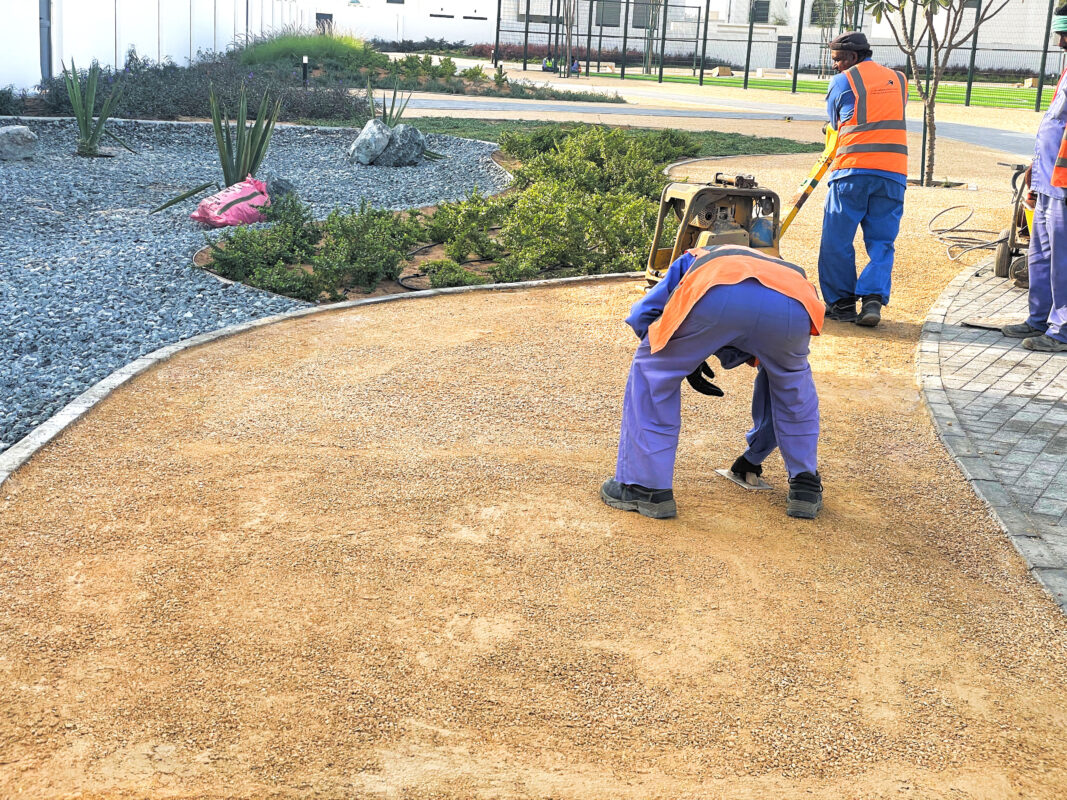
The strength of the surface comes from depth, so we must help the chemical penetrate below the surface. After the first spray, use a shovel, rake, or similar tools to scratch the surface and shuffle the particles, bringing uncovered particles to the top and spraying chemical onto them. Continue this process until most particles down to a reasonable depth (3–5 cm) are thoroughly coated before moving on to compaction.
During construction, the team must carefully ensure that all areas look “wet” throughout application, as compaction and leveling can expose dry particles. In our projects, we assign one person specifically to spraying, continuously applying more chemical to any dry areas.
- Extra Tips:
Although it may be tempting to construct soil and sand stabilizer surfaces using a resin-bound-style mixing and paving method, our experience shows that this often leads to excessive usage. Acrylic, especially when diluted with water, is very fluid; when mixed with particles in a bucket and then paved, much of it sinks into the substrate.
Usage varies from case to case, but as a general principle, invest more resin in the initial application rather than in the topcoat.
3. Prepare a Proper Substrate
- Problem:
Many contractors, including our own team in earlier projects, have been puzzled by mysterious loose spots that appear the next day, often small circular areas that seem completely unbound by the chemical despite careful coverage during application.
- Explanation:
The invisible culprit is moisture evaporation. We usually work on soft substrates such as compacted gravel, sand, or soil without underlying drainage. The stabilized surface (especially when many fine particles are present) can form a relatively impermeable barrier. When the ambient temperature rises, moisture trying to escape from the substrate cannot dissipate quickly and instead pushes upward, rupturing the surface layer.
- Solution:
Ideally, install proper drainage in the substrate beforehand to divert excess moisture. This also greatly improves durability in rainy conditions.
If drainage cannot be provided, we recommend applying a sealing coat (epoxy or acrylic) onto the substrate before constructing the stabilized surface. This helps resist upward moisture pressure.
- Extra Tips:
If budget or other constraints prevent you from implementing these measures, you can still proceed, but plan for minor post-application repairs. The earlier repairs are made, the less visible the color difference will be. In practice, we conduct a daily walk-through every afternoon to inspect the previous day’s work and patch any loose spots.
4. Usage Varies Case by Case
- Problem:
Online references for acrylic resin usage vary dramatically. It can feel impossible to determine how much resin to use per square meter or how much water to add.
- Explanation:
In reality, usage depends on many factors, including construction environment (temperature, humidity), particle characteristics, and load-bearing requirements. Sometimes we even adjust the usage from noon to evening on the same project. It is therefore not realistic to produce a universal chart that accurately summarizes usage.
- Solution:
Always prepare a sample under the intended construction conditions and measure actual usage. Allow at least 15% extra for wastage in your calculations. Adjust the usage whenever conditions change (for example, temperature shifts).
You can also contact our expert team for recommendations tailored to your project.
- Extra Tips:
As a general rule, moderately increase the dilution of water when the weather is hot to slow down curing.
The finer the particles (including powder residues), the more resin they typically absorb. If you are working with gravel that contains a lot of dust and you wish to maintain a gravel-like texture, we recommend pre-treating the aggregates with an air blower or power washer to remove dust. This can significantly reduce resin consumption.
Conclusion:
Effective soil and sand stabilizer construction is not as simple as it appears in a basic manual. Application timing, chemical penetration, substrate preparation, and usage calculation all have a direct impact on the final result. Choosing a high-quality soil and sand stabilizer is the first step toward a natural-looking, environmentally friendly landscape, while rigorous construction practices ensure the most durable and seamless finish.
We will continue sharing professional landscaping advice. Follow our social media channels to stay updated, and contact our expert team to learn more.
About Us
We are both a manufacturer and developer of innovative coating products under Gaungzhou GBS, and a UAE-based local supplier and installer under Synergy & Prosperity Building Material Trading and Technical Services, specializing in resin bound systems, soil stabilizers, and wall paints. Founded to bridge advanced global resin technology with real on-site needs, our team combines over two decades of technical know-how with hands-on project experience across villas, parks, and commercial developments.